Dacor is a well-known brand of high-end ranges, ovens, cooktops, and other kitchen appliances. Dacor ranges are designed to offer superior performance, style, and innovation. However, like any appliance, they may encounter some problems over time that require troubleshooting and repair. In this article, we will provide you with a comprehensive guide on how to troubleshoot and fix common problems with Dacor ranges, such as oven not heating, burners not igniting, or display not working. We will also include step-by-step instructions, photos, and videos to help you DIY your repairs. Additionally, we will list some of the top-selling models of Dacor ranges and the most common parts that may need to be replaced.
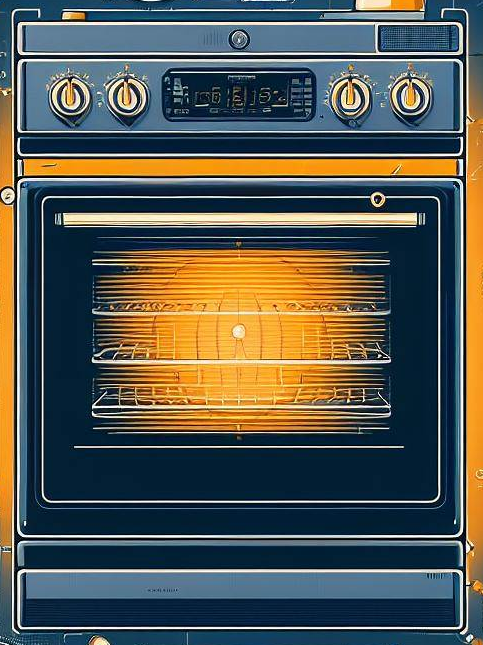
Oven Not Heating
One of the most common problems with Dacor ranges is when the oven does not heat up properly or at all. This can be caused by several factors, such as a faulty temperature sensor, a defective heating element, a bad relay board, or a broken thermostat. To troubleshoot this problem, you will need to test each component with a multimeter and replace the faulty part if necessary.
How to Test and Replace the Temperature Sensor
The temperature sensor is a probe that measures the temperature inside the oven and sends the signal to the control board. If the sensor is defective, it may not read the correct temperature or send the wrong signal, resulting in an oven that does not heat up or heats up unevenly. To test the temperature sensor, follow these steps:
- Unplug the range from the power source and turn off the gas supply valve if you have a gas model.
- Locate the temperature sensor inside the oven. It is usually attached to the back wall of the oven with two screws.
- Remove the screws and pull out the sensor. You may need to disconnect the wires from the sensor first.
- Set your multimeter to ohms and touch the probes to the two terminals of the sensor. The resistance reading should be around 1100 ohms at room temperature. If the reading is significantly higher or lower than that, or if there is no continuity at all, the sensor is faulty and needs to be replaced.
- To replace the sensor, simply reverse the steps above and install a new sensor in place of the old one. Make sure to reconnect the wires correctly and secure the sensor with screws.
How to Test and Replace the Heating Element
The heating element is a coil of metal that heats up when electricity passes through it. There are two types of heating elements in a Dacor range: bake element and broil element. The bake element is located at the bottom of the oven and provides heat for baking. The broil element is located at the top of the oven and provides heat for broiling. If either of these elements is defective, it may not heat up at all or heat up partially or intermittently. To test the heating element, follow these steps:
- Unplug the range from the power source and turn off the gas supply valve if you have a gas model.
- Locate the heating element inside the oven. It is usually attached to the back wall of the oven with two screws.
- Remove the screws and pull out the element. You may need to disconnect the wires from the element first.
- Set your multimeter to ohms and touch the probes to the two terminals of the element. The resistance reading should be between 10 and 40 ohms. If the reading is significantly higher or lower than that, or if there is no continuity at all, the element is faulty and needs to be replaced.
- To replace the element, simply reverse the steps above and install a new element in place of the old one. Make sure to reconnect the wires correctly and secure the element with screws.
How to Test and Replace the Relay Board
The relay board is an electronic component that controls the power supply to the heating elements in the oven. If the relay board is defective, it may not send the correct voltage or current to the elements, resulting in an oven that does not heat up or heats up erratically. To test the relay board, follow these steps:
- Unplug the range from the power source and turn off the gas supply valve if you have a gas model.
- Locate the relay board inside the control panel of the range. It is usually a rectangular circuit board with several wires and relays attached to it.
- Remove the screws and clips that hold the control panel in place and pull it out. You may need to disconnect some wires from the control board first.
- Set your multimeter to volts and touch the probes to the terminals of the relay board that correspond to the heating elements. For example, if you want to test the bake element, touch the probes to the terminals labeled BAKE. The voltage reading should be 120 volts when the oven is set to bake. If the reading is zero or fluctuates, the relay board is faulty and needs to be replaced.
- To replace the relay board, simply reverse the steps above and install a new relay board in place of the old one. Make sure to reconnect the wires correctly and secure the control panel with screws and clips.
How to Test and Replace the Thermostat
The thermostat is a device that regulates the temperature inside the oven by turning on and off the heating elements. If the thermostat is defective, it may not sense the correct temperature or respond properly, resulting in an oven that does not heat up or overheats. To test the thermostat, follow these steps:
- Unplug the range from the power source and turn off the gas supply valve if you have a gas model.
- Locate the thermostat inside the oven. It is usually a small metal rod with a knob attached to it that protrudes from the back wall of the oven.
- Remove the knob and pull out the thermostat. You may need to disconnect some wires from the thermostat first.
- Set your multimeter to ohms and touch the probes to the two terminals of the thermostat. The resistance reading should change as you turn the knob. If the reading does not change or is erratic, the thermostat is faulty and needs to be replaced.
- To replace the thermostat, simply reverse the steps above and install a new thermostat in place of the old one. Make sure to reconnect the wires correctly and secure the knob.
Burners Not Igniting
Another common problem with Dacor ranges is when the burners do not ignite properly or at all. This can be caused by several factors, such as a wet or dirty igniter, a faulty spark module, a bad gas valve, or a clogged burner orifice. To troubleshoot this problem, you will need to inspect each component and clean or replace the faulty part if necessary.
How to Clean and Replace the Igniter
The igniter is a device that produces a spark when electricity passes through it. The spark ignites the gas that flows through the burner. If the igniter is wet or dirty, it may not produce a spark or produce a weak spark, resulting in a burner that does not ignite or ignites slowly. To clean or replace the igniter, follow these steps:
- Unplug the range from the power source and turn off the gas supply valve if you have a gas model.
- Locate the igniter on top of the burner. It is usually a small metal rod with a ceramic tip that protrudes from the burner base.
- Remove the burner grate, burner cap, burner ring, and burner head from the burner base. You may need to lift or twist them off.
- Clean the igniter with a soft brush or cloth. Remove any dirt, grease, or moisture from the igniter tip. Do not use any abrasive materials or liquids that may damage the igniter.
- If cleaning does not solve the problem, you may need to replace the igniter. To do so, disconnect the wire from the igniter and unscrew or unclip it from the burner base. Install a new igniter in place of the old one and reconnect the wire.
- Reassemble the burner by reversing the steps above.
How to Test and Replace the Spark Module
The spark module is an electronic component that controls the power supply to the igniters on the burners. If the spark module is defective, it may not send the correct voltage or current to the igniters, resulting in burners that do not ignite or ignite intermittently. To test the spark module, follow these steps:
Unplug the range from the power source and turn off the gas supply valve if you have a gas model.
- Locate the spark module inside the control panel of the range. It is usually a square or rectangular circuit board with several wires and connectors attached to it.
- Remove the screws and clips that hold the control panel in place and pull it out. You may need to disconnect some wires from the control board first.
- Set your multimeter to volts and touch the probes to the terminals of the spark module that correspond to the igniters. For example, if you want to test the igniter for the front left burner, touch the probes to the terminals labeled FL. The voltage reading should be 120 volts when the burner knob is turned to ignite. If the reading is zero or fluctuates, the spark module is faulty and needs to be replaced.
- To replace the spark module, simply reverse the steps above and install a new spark module in place of the old one. Make sure to reconnect the wires correctly and secure the control panel with screws and clips.
How to Test and Replace the Gas Valve
The gas valve is a device that controls the flow of gas to the burners. If the gas valve is defective, it may not open or close properly, resulting in burners that do not ignite or have low or uneven flames. To test the gas valve, follow these steps:
- Unplug the range from the power source and turn off the gas supply valve if you have a gas model.
- Locate the gas valve behind the lower access panel of the range. It is usually a metal box with a knob and several pipes and wires connected to it.
- Remove the screws that hold the lower access panel in place and pull it out. You may need to disconnect some wires from the gas valve first.
- Set your multimeter to ohms and touch the probes to the terminals of the gas valve that correspond to the burners. For example, if you want to test the gas valve for the front left burner, touch the probes to the terminals labeled FL. The resistance reading should be between 200 and 400 ohms. If the reading is significantly higher or lower than that, or if there is no continuity at all, the gas valve is faulty and needs to be replaced.
- To replace the gas valve, simply reverse the steps above and install a new gas valve in place of the old one. Make sure to reconnect the wires correctly and secure the lower access panel with screws.
How to Clean the Burner Orifice
The burner orifice is a small hole that regulates the amount of gas that flows through the burner. If the burner orifice is clogged with dirt, grease, or debris, it may restrict the gas flow, resulting in burners that do not ignite or have low or uneven flames. To clean the burner orifice, follow these steps:
- Unplug the range from the power source and turn off the gas supply valve if you have a gas model.
- Locate the burner orifice on top of the burner base. It is usually a small brass fitting with a hexagonal head that protrudes from the burner base.
- Remove the burner grate, burner cap, burner ring, and burner head from the burner base. You may need to lift or twist them off.
Use a wrench or pliers to unscrew the burner orifice from the burner base. Be careful not to damage or lose the orifice.
- Use a needle or a thin wire to poke through the hole of the orifice and remove any dirt, grease, or debris that may be clogging it. Do not enlarge or distort the hole of the orifice.
- Use a soft brush or cloth to clean the exterior of the orifice. Remove any dirt, grease, or moisture from the orifice. Do not use any abrasive materials or liquids that may damage the orifice.
- Reinstall the burner orifice by reversing the steps above. Make sure to screw it tightly and align it correctly with the igniter.
- Reassemble the burner by reversing the steps above.
Display Not Working
Another common problem with Dacor ranges is when the display does not work properly or at all. This can be caused by several factors, such as a loose or damaged ribbon cable, a faulty control board, a bad touchpad, or a blown fuse. To troubleshoot this problem, you will need to check each component and replace the faulty part if necessary.
How to Check and Replace the Ribbon Cable
The ribbon cable is a flat and flexible cable that connects the control board to the display and touchpad. If the ribbon cable is loose or damaged, it may cause the display to malfunction or not show anything at all. To check and replace the ribbon cable, follow these steps:
- Unplug the range from the power source and turn off the gas supply valve if you have a gas model.
- Locate the ribbon cable inside the control panel of the range. It is usually a thin and wide cable that runs from the control board to the display and touchpad.
- Remove the screws and clips that hold the control panel in place and pull it out. You may need to disconnect some wires from the control board first.
- Inspect the ribbon cable for any signs of damage, such as cuts, tears, burns, or corrosion. Also check if the ribbon cable is securely connected to the control board and the display and touchpad. If the ribbon cable is loose, reconnect it firmly. If the ribbon cable is damaged, replace it with a new one.
- To replace the ribbon cable, simply reverse the steps above and install a new ribbon cable in place of the old one. Make sure to reconnect the wires correctly and secure the control panel with screws and clips.
How to Test and Replace the Control Board
The control board is an electronic component that controls the functions and settings of the range, such as the temperature, timer, clock, and modes. If the control board is defective, it may cause the display to show an error code, freeze, flicker, or not work at all. To test and replace the control board, follow these steps:
- Unplug the range from the power source and turn off the gas supply valve if you have a gas model.
- Locate the control board inside the control panel of the range. It is usually a large circuit board with several wires and connectors attached to it.
- Remove the screws and clips that hold the control panel in place and pull it out. You may need to disconnect some wires from the control board first.
- Inspect the control board for any signs of damage, such as burns, cracks, or corrosion. Also check if the control board is receiving power from the power cord. To do so, set your multimeter to volts and touch the probes to the terminals of the power cord connector on the control board. The voltage reading should be 120 volts. If the reading is zero or fluctuates, the control board is faulty and needs to be replaced.
- To replace the control board, simply reverse the steps above and install a new control board in place of the old one. Make sure to reconnect the wires correctly and secure the control panel with screws and clips.
How to Test and Replace the Touchpad
The touchpad is a device that allows you to select and adjust the settings of the range by touching the buttons on the display. If the touchpad is defective, it may not respond to your touch or register incorrect inputs, resulting in a display that does not work properly or at all. To test and replace the touchpad, follow these steps:
- Unplug the range from the power source and turn off the gas supply valve if you have a gas model.
- Locate the touchpad on the front of the control panel of the range. It is usually a plastic or glass panel with several buttons on it.
- Remove the screws and clips that hold the control panel in place and pull it out. You may need to disconnect some wires from the control board first.
- Inspect the touchpad for any signs of damage, such as cracks, scratches, or stains. Also check if the touchpad is securely connected to the ribbon cable and the control board. If the touchpad is loose, reconnect it firmly. If the touchpad is damaged, replace it with a new one.
- To test the touchpad, you can use a multimeter or an ohmmeter. Set your device to ohms and touch the probes to the terminals of the touchpad that correspond to the buttons. For example, if you want to test the button for bake, touch the probes to the terminals labeled BAKE. The resistance reading should change when you press and release the button. If the reading does not change or is erratic, the touchpad is faulty and needs to be replaced.
To replace the touchpad, simply reverse the steps above and install a new touchpad in place of the old one. Make sure to reconnect the wires correctly and secure the control panel with screws and clips.
How to Check and Replace the Fuse
The fuse is a safety device that protects the range from the power surges or short circuits. If the fuse is blown, it may cut off the power supply to the display and other components of the range, resulting in a display that does not work at all. To check and replace the fuse, follow these steps:
- Unplug the range from the power source and turn off the gas supply valve if you have a gas model.
- Locate the fuse inside the control panel of the range. It is usually a small cylindrical or rectangular metal or ceramic device with two wires attached to it.
- Remove the screws and clips that hold the control panel in place and pull it out. You may need to disconnect some wires from the control board first.
- Inspect the fuse for any signs of damage, such as burns, cracks, or melting. Also check if the fuse has continuity. To do so, set your multimeter to ohms and touch the probes to the two terminals of the fuse. The resistance reading should be zero or close to zero. If the reading is infinite or very high, the fuse is blown and needs to be replaced.
- To replace the fuse, simply reverse the steps above and install a new fuse in place of the old one. Make sure to reconnect the wires correctly and secure the control panel with screws and clips.
Top-Selling Models of Dacor Ranges
According to my web search, some of the top-selling models of Dacor ranges are:
- [Dacor Modernist 48″ Dual Fuel Range]: This model features a 7-inch LCD touch screen, six dual-stack sealed brass burners, two electric ovens with steam and convection modes, Wi-Fi connectivity, and self-cleaning function.
- [Dacor Heritage 36″ Gas Range]: This model features a 7-inch LCD touch screen, six dual-stack sealed brass burners, one gas oven with convection mode, Wi-Fi connectivity, and self-cleaning function.
- [Dacor Renaissance 30″ Electric Range]: This model features a 7-inch LCD touch screen, four radiant ceramic elements, one electric oven with convection mode, Wi-Fi connectivity, and self-cleaning function.
Most Common Parts for Dacor Ranges
According to my web search, some of the most common parts that may need to be replaced for Dacor ranges are:
- [Temperature Sensor]: This part measures the temperature inside the oven and sends the signal to the control board.
- [Heating Element]: This part heats up when electricity passes through it and provides heat for baking or broiling.
- [Relay Board]: This part controls the power supply to the heating elements in the oven.
- [Thermostat]: This part regulates the temperature inside the oven by turning on and off the heating elements.
- [Igniter]: This part produces a spark when electricity passes through it and ignites the gas that flows through the burner.
- [Spark Module]: This part controls the power supply to the igniters on the burners.
- [Gas Valve]: This part controls the flow of gas to the burners.
- [Burner Orifice]: This part regulates the amount of gas that flows through the burner.
- [Ribbon Cable]: This part connects the control board to the display and touchpad.
- [Control Board]: This part controls the functions and settings of the range, such as the temperature, timer, clock, and modes.
- [Touchpad]: This part allows you to select and adjust the settings of the range by touching the buttons on the display.
- [Fuse]: This part protects the range from power surges or short circuits.
We hope this article has helped you troubleshoot and fix common problems with your Dacor range. If you need more help or have any questions, please feel free to contact us at any time.